PRINT SCANNING USING A VACUUM TABLE (TECHNICAL)
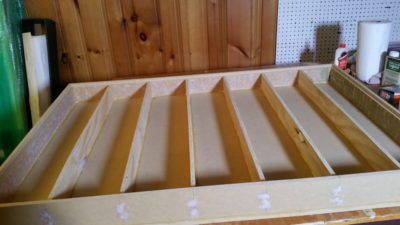
Vacuum table carcass 2017
Instead I went ahead with shooting my prints. The main advantage was I had done all the work necessary to print them well so I could focus my attention on getting a good scan. Early on I made a decision that added a fairly large sub-project to the mix. The problem I foresaw was getting the prints flat. I had an easel/setup I’d built earlier for copy work but the B & W prints were curled worse than the color ones and I noticed reflections and bubbles with both – sometimes it looked more like waves on the ocean than a flat surface – and doubted I’d get the quality I was after that way. Why buy a high end camera and shoot that?
I decided to build a vacuum table to hold the prints perfectly flat when shooting them. I spent some time trawling the internet and found sources that helped me design my own. There are industrial uses for vacuum tables even for cabinetmaking so I read about them too and ended up using some ideas from them as well – principally in creating chambers that could be shut off when shooting smaller prints as well as being able to regulate the pressure going to the individual chambers as needed. Here is the carcass I built to start with, using scraps I had on hand as well as castoff pieces I’d used as backing when drilling holes…
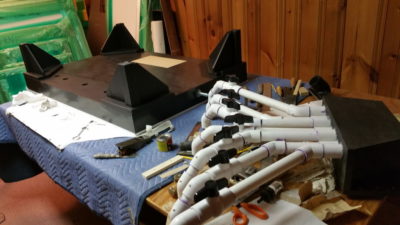
Vacuum table base with stands added and completed manifold with vacuum feed pipes 2017

Vacuum Table in horizontal position 2017
Here it is later on in the process, along with the manifold with the valves and pipes to feed the table from my old large Sears shop-vac:
And another shot of it completed. I repurposed a stand I’d created years earlier which I used to add paint layers/exposures when I was doing multiple exposures. Here I incorporated an idea I got from a fine article describing how to make a vacuum table for art copying, by making the table tiltable. In this photo it shows the table locked in a horizontal position. You can also see the other end of the manifold that connected it to the vacuum cleaner which I kept in another room, as far away as I could get it due to the noise.
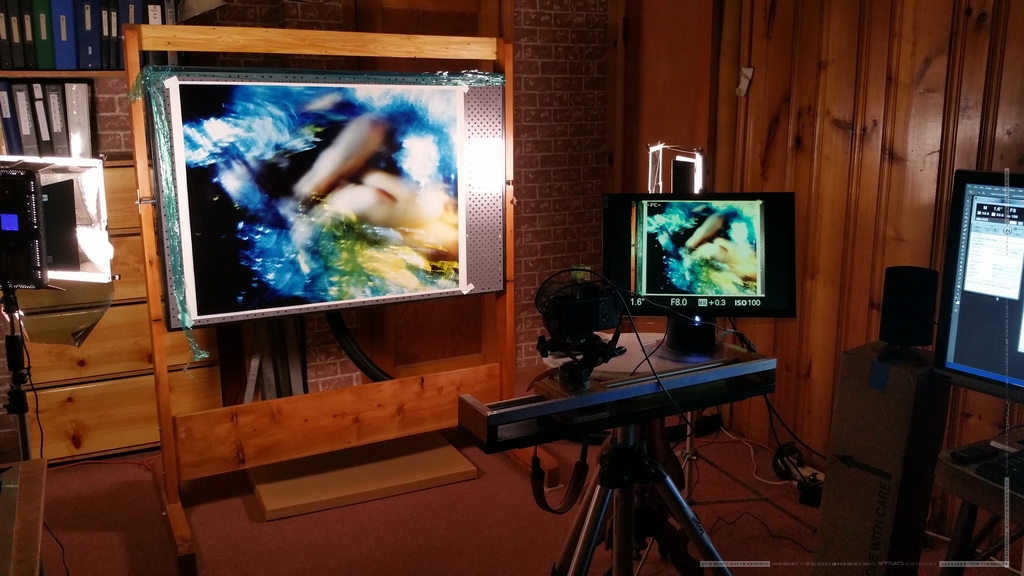
Working with the vacuum table was a dream. I was able to use it to quickly shoot not only my prints, some as large as 30×40″, but also family photos that I decided to digitize, as well as all sorts of documents. I also created an apparatus to hold the camera that could slide on stainless steel rails for the stitching of multiple photos which you can see in the following image of the table in action. Although I didn’t stitch any truly high resolution photos for this site, I found using the rails helpful in aligning the camera as well as in making small adjustments to center the photo. The monitor I attached to the camera was a very defective one that I managed to calibrate into a useable range for focusing. It actually looks worse than it was in the following photo, more a function of a mismatch between the color of the lights and camera, than its poor quality. I have of necessity used lots of very defective equipment over the years. For lots of tasks, it really didn’t matter, though I did save lots of money doing so.
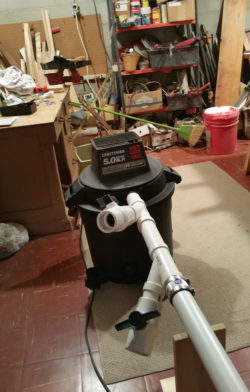
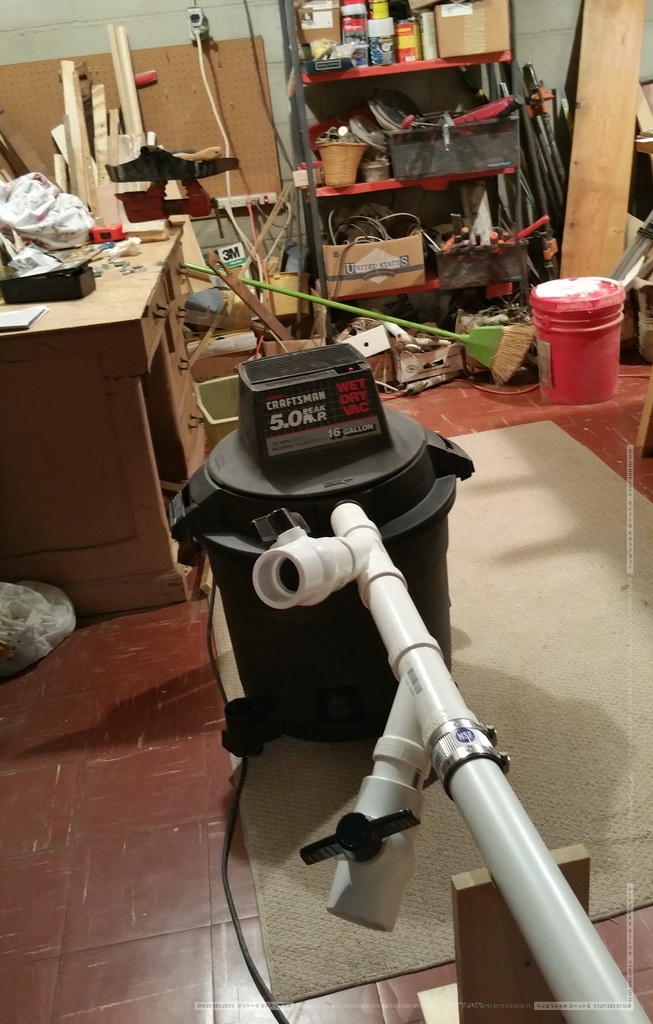
My circa mid 80s Sears shop-vac showing spill valves 2017

Vacuum Table in action – gray areas you see are for chambers that were shut off for this size – 2017
You may be able to just make out the router speed controller on the floor to the right of and below the monitor that I used to regulate the voltage to the shop-vac. It allowed me to further fine tune the suction so that I could get the prints flat but eliminate the dimpling caused by too strong of a pressure as well as reduce the noise substantially.
Even more important though was adding spill valves to the shop-vac itself. When I was building the table I was unsure if I would be able to get enough pressure and so I sealed everything as best I could, using glue, bondo, caulking, paint and rubber gaskets. The problem turned out to be the opposite – the shop vac and vacuum table were too powerful for delicate artwork. It could in fact be used for industrial purposes, at least by me. Here is a shot of my shop-vac about 30′ away in another room with my spill valves. You can see the one closest to the intake is wide open – spilling half the vacuum force – and the other is a little less than half open – spilling another 10% or so of the force. This got the suction into a useable range that I could fine tune with the voltage controller.

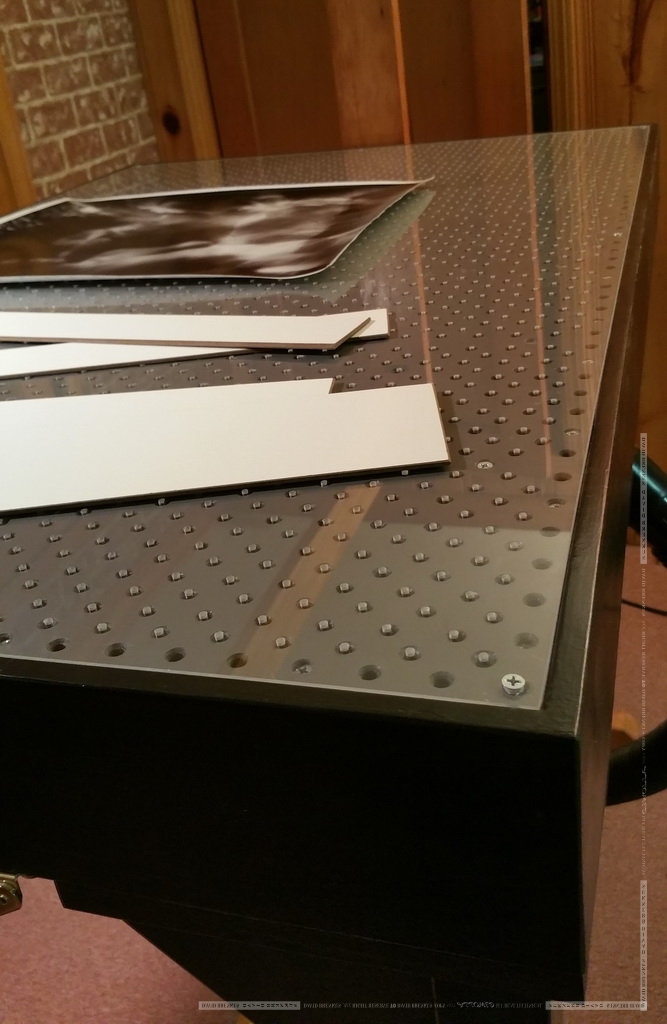
Using plastic wrap to seal holes for mural prints 2017
For those interested in doing something like this, I would like to point out the importance of covering all the holes that are creating suction with mats, for standard sized prints, or some other arrangement, such as plastic film packing wrap which I used to quickly seal rows of holes when shooting large prints. Any vacuum table whistles and howls terribly. I found it impossible to think with the noise and I knew I had to work days with it. After covering unused holes, I found that the noise dropped down to a whisper, almost totally quiet. It is also important to move the shop-vac far away and sound proof any doors leading to it as it too is extremely loud. Between these two strategies I dropped the sound level from around 100 decibels to a comfortable 40 to 50. It would have even been less but the basement I did this in has central heating ducts that connect the two rooms, so a very little sound from the shop-vac travelled through them. Nevertheless I could listen to quiet jazz as I used the table. In the end, I found for prints that were 16×20 and below, it was quicker to keep the table vertical and use plastic corners to hold and align the print before adding the mat mask.
Another hint has to do with the drilling of the holes for the top or tops, which is important because there are thousands of holes to drill. I had two tops, one made of two peg boards that I contact glued together and an outer one made of acrylic with smaller holes. In retrospect I should have scrupulously followed the Wilhelm Imaging article as it would have saved a lot of time as well as wear and tear on my arm. Using pegboards to save time was a bad decision. The ones I was able to purchase were not uniform and I ended up also adding another set of holes between them and for the perimeter of my most used size (16×20″). It is far better to start with a flat sheet of mdf and drill all the holes as they recommend, unless of course you have access to a CNC to do it all for you. Happily, in spite of the mistakes I made building it, it turned out fine.

Vacuum Table top showing acrylic surface 2017

Vacuum table in horizontal position showing front of manifold 2017
My vacuum table is heavy and can barely be lifted by one person, which I had to do to mount it in the stand. If I had to do it again I would probably try wherever possible to use lighter materials and build the chambers less deep. That said, using my cabinetmaking skills, I was able to build it absolutely flat, which was partly possible due to the gauge of the materials. Once in place, if you have the space for it which I did, there is no need to move it and it was wonderful to work with – it looks and feels like a professional piece of equipment. As they say though, the proof is in the pudding. More important for me was I was very happy with the scans I got from the process, of which the vacuum table was just one part. For those interested in dimensions, the table is about 48x32x5″ not counting the manifold or legs.
Interestingly to me, even after using such fine equipment to shoot my prints, I still heard the echoes of their strange origins in my wildly varying negatives. I found they still had to be dealt with individually rather than applying blanket settings to the files. This however was pretty subtle, more a question of tweaking the color balance through the camera’s raw file conversion settings, and I didn’t agonize over it. On the contrary, I tuned the final image settings quickly by eye, by comparing my calibrated monitor image to the print I taped to the vacuum table as reference. Below is an example of the notes I took as I went through this final process.
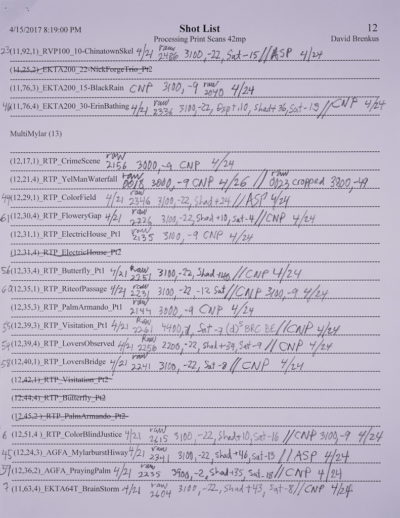
Print scan processing notes sample 2017

VacTableCarcass-1K

VacBasePlusManifold-1K

VacTableHoriz-1K

VacTableInAction-1K
VacTableMural-1K
VacWithSpillValves-1K
VacTableTop-1K

VacTableSideBackView-1K
